Tuesday 19 May 2015
Meteor VFX shot
One of my university assignments this year was to create several visual effects shots. One of the requirements was a live action back plate. I decided to composite decay, grime and a sky replacment onto live action footage of a simple house, turning it from a normal building into a decaying structure also adding colour correction to create atmosphere. I did this prodominately in After Effects using Mocha to track the building to composite the decay and grime in and Photoshop to paint it in. Overall I was really happy with the result although some of the tracking could do with a bit of tweaking and the roto of the building wasnt as precise as I wouldve wanted.


Throughout the production of the Headless short film I also learnt to create UV textures in Maya by unwrapping them in the UV texture editor. This can be a long process as some of the buildings we were unwrapping had high polygon areas like window frames, guttering and arials. I learnt to unwrap effeciently and lay out understandable UV's and later created textures from these to use on other buildings within the project.


Throughout this process we encountered many problems that needed solving. The team wanted more floor space to animate on for the bench shot. As the footage we were using was filmed to high it required making a set extension. To do this we copied the frame to photoshop and painted on a wide floor extention using the brush, fill and patch tools. It took alot of tweaking to get it right but finally we were able to composite it behind the footage in after effects while key framing the footage to move gradually up then back down to accomadate the extension. Again this took time to adjust to the right settings.
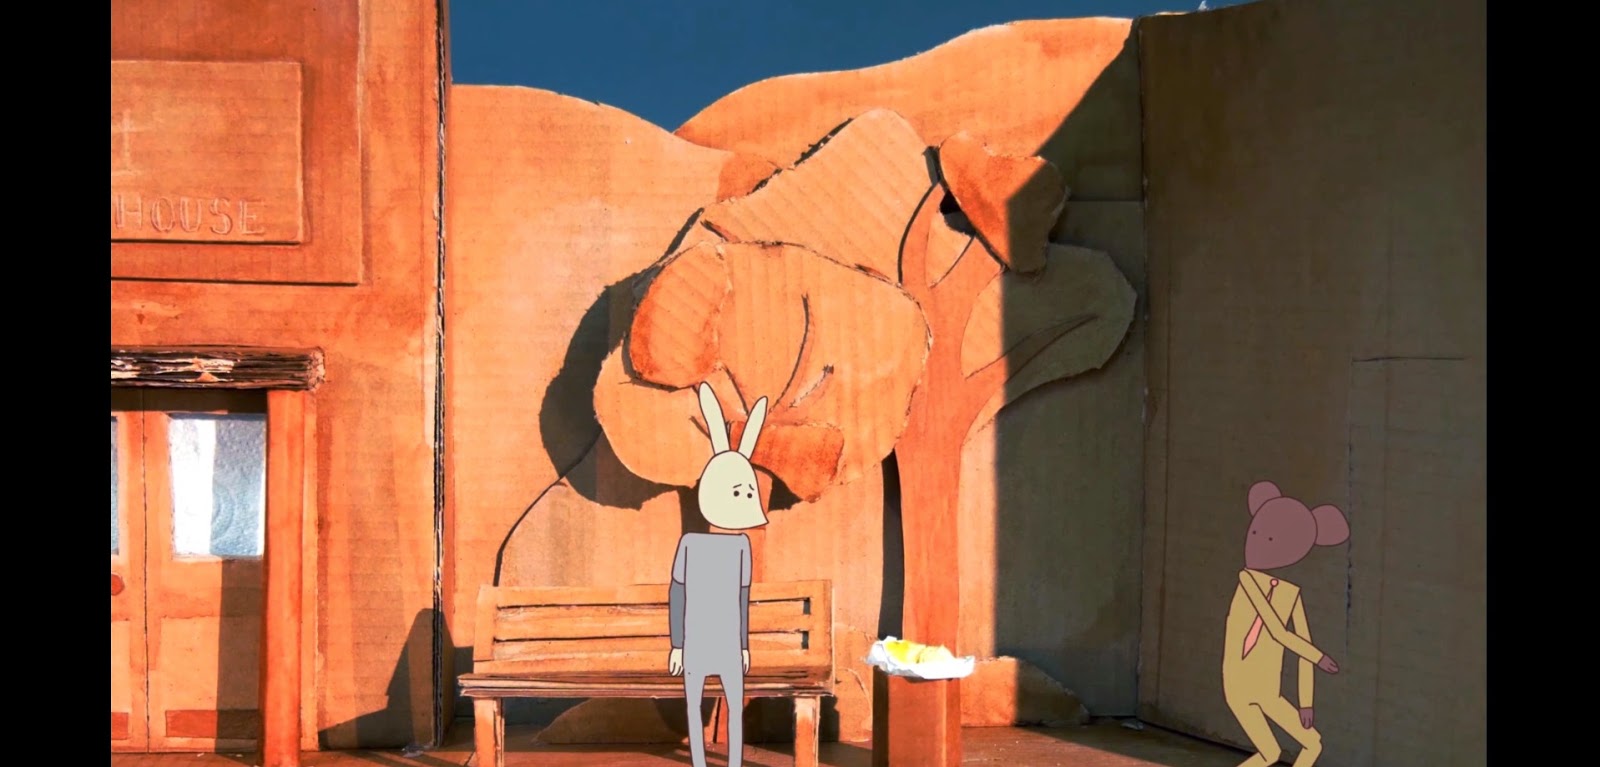
In the end we were able to create succesful footage which was asthetically very strong and meeted the script reuirements. This was then given to the animators. Here are some frames from that stage of the pipeline.


The animation we were making required the creation of a
large model town on which the characters would later perform. Although the vast
majority of this was made by the director Martin Burn I pitched in to create
the odd tree or chair. After the set was finished it was the job of filming the
back plate which we ambitiously planned to shoot in one continuous take,
dollying from one side to the other stopping on queues to allow time for the
story to progress. This posed many challenges, one of which being the lighting.
We set up three dedo lights, two illuminating the set from the front at
different angles allowing us to cast shadows into specific areas while leaving
others more brightly lit and another behind keeping the doors tight to allow
only a small amount of light onto the building windows creating of the illusion
of light on in the house.
The main problem we encountered while filming this back
plate was keeping the continuous camera movement steady and in time with the
script, stopping at certain times to allow scenes to playout. Although things
such as camera wobble and small editing problems could be fixed in
post-production we wanted to create a back plate that was as close to the
script as possible. For this we created a system of markers on the floor
writing times for stopping and panning allowing us to get the camera movement
as accurate as possible. Although it wasn’t perfect and it took many takes we
came out with some really successful footage.
Monday 18 May 2015
Subscribe to:
Posts (Atom)